Tuesday, July 2, 2013

Garlic Chicken - the Ina Garten way

To me the biography of Ina Garten, a well known American TV chef, always reads like a fairy tale. A passionate cook from an early age on, Mrs Garten initially chose to study Economics and went on to work for the US government in Washington D.C.. In 1978 she stumbled upon an add for a small deli in the West Hamptons ("Barefoot Contessa") and decided to turn her hobby into a career. The shop quickly expanded and by the mid-1980s she had opened a large store in the exclusive East Hamptons (her shop has even featured in a movie with Jack Nicholson). Eventuelly Ina Garten sold her shop, but went on to publish a series of cook books and even has her own TV show. In retrospect her initial decision to by that small deli in the Hamptons might seem entirely logical, but few people really have the courage to give up a safe job for such a risk. Chapeau!

The recipe below is one of hers (adapted very slightly) and is truly wonderful. The amount of garlic used might seen daunting to the uninitiated, but trust me on this one!


Ingredients (serves 3-4):


1 organic chicken (1,5kg)
350 ml white wine
3 tablespoons of cognac
3-4 twigs of thyme
2 large bulbs of garlic
2-3 tablespoons of creme fraiche
1 teaspoon of sugar
1 tablespoon of flour
butter, olive oil
salt, pepper


Preparation:


1. First you will need to cut your chicken into 10 pieces. You can have this done by your butcher, but it's pretty easy to do this at home once you know how. Start by cutting off the two wings, then separate the legs (cutting each into half along the middle joint), and, last but not least, remove the breast filets. These should ideally remain on the bone (each breast cut into half), but if you find this too difficult, you can also use them off the bone.

2. Generously season the chicken with salt and pepper. Heat some butter and some olive oil in a heavy pan and fry the chicken in batches until it is golden brown. Take your time doing this, you want the chicken to brown evenly.

 3. In the meantime, separate the garlic cloves and blanch them in some boiling water (1 minute will do). Once they have cooled off slightly, peel them and, in case the cloves are particularly large, cut them in half.

4. Once the chicken is done, set aside and gentry saute the garlic (in the same pan) for about 10 minutes until it's taken on a fair bit of color. You might want to turn down the heat for this though, garlic takes on an unpleasant bitter taste when burned.  

5. Add the wine and the cognac to the pan and allow to boil briefly. Using a wooden spatula, scrape the brown bits off the bottom of the pan. Add the thyme and return the chicken to the pan. Close the lid and cook for 30 min over low heat (the liquid should be simmering, not boiling). 


6. Remove the chicken from the pan and set aside briefly. In a small bowl, whisk a couple of tablespoons of the cooking liquid with the flour and whisk it back into the sauce. Add the creme fraiche and the sugar before seasoning to taste with salt and pepper.


Serve with some greens and plenty of fresh baguette to mop up the sauce!


Thursday, June 20, 2013

Rhubarb-crumble Cake

Earlier this year, I set myself a challenge to tackle the art of baking...much to the delight of my colleagues, who have become spoilt rotten in the process :-). These days, their morning greeting is inevitably accompanied by surreptitious glances to check whether I happen to be carrying any boxes! My suggestion that baking cakes could be done in turns has so far fallen on deaf ears, but truth be told I am glad to have such a willing group of food critics (otherwise I might be tempted to eat all the pies myself!!!).

Here is tomorrow's cake delivery: rhubarb-crumple cake, the perfect way to adapt crumble for day-time eating.


Ingredients: 

For the dough:
25 g of fresh yeast
400 g flour
200 ml milk
80 g sugar 
1 medium-sized egg
80 g unsalted soft butter
salt

For the crumble:
150 g flour
50 g cornflour
100 g roughly chopped almonds
150 g sugar
150 g cold unsalted butter

For the topping:
1 kg rhubarb
2-3 tablespoons of sugar


Preparation

1. Place the flour in a large bowl and form a well in the middle. Heat the milk until it's just slightly warm. In a glass, mix the yeast, the sugar and about 1/4 of the milk until all ingredients are dissolved. Pour the yeast mixture and the remaining milk in the well, adding the egg and 1/4 teaspoon of salt. Start mixing the ingredients using a fork, working from the inside to the outside. Once the dough starts coming together, add the butter and, using your hands this time, start kneading the dough until it is smooth but still slightly sticky (this is best done on a well-floured work surface). Return the dough to the bowl, cover and allow to rest for 1 hour in a warm draft-free spot. 

2. Place all ingredients for the crumble in a second bowl. Rub the butter, flour, sugar and almonds together until you have achieved that crumbly consistency. Place in the fridge. 

3. When the dough has risen, deflate it and place it in the middle of a baking tray (either well greased or covered with some baking paper). Spread the dough (using your hands) to the edges of the tray. The dough is going to be quite elastic, so you are going to have to put in a bit of an effort :-)

4. Wash and (where needed) peel the rhubarb and cut it into 5-7cm long sticks. Place these on the dough (pressing down slightly) until it's entirely covered. Sprinkle with the sugar and allow to rest for another 15 mins before adding the crumble. 

5. The cake goes into the pre-heated oven (180°C) for 35 mins. Then turn on the grill and allow to bake for an additional 5 mins until the crumble has that lovely golden color. 

Recipe adapted from: www.essen-und-trinken.de

Monday, June 17, 2013

Mango-avocado salad with coriander-lime dressing

I once ate this in a restaurant in Stockholm and immediately set upon re-creating the dish when I got home. It's AMAZING! The combination of flavors is perfect and it's great both as a starter and a main course. In this case I served it with some seared tuna, but garlic infused jumbo shrimp off the barbecue work a treat too.

One cautionary note though: you need to make sure (!!) that you get RIPE avocados and a RIPE mango. This dish won't work at all if you end up with a half-ripe avocado or one of those horrible mangos that tastes like nothing. Unless you have a reliable source, I therefore recommend buying both a few days in advance.


Ingredients (serves 2 as a main or 4 as a starter):

2 ripe avocados
1 large mango
1 bunch of coriander
2 limes
2 large tomatoes
Vegetable oil (olive oil doesn't work here)
1-2 red chilis
salt


Preparation

1. Peel the avocados and the mango and cut both in 1cm cubes. Finely chop the coriander leaves, putting the stems aside. Halve the tomatoes and remove the seeds, then cut the tomato into smallish cubes. In a salad bowl, mix the mango, the avocado and the tomato. 

2. For the dressing, mix 3-4 tablespoons of vegetable oil, the juice of 1-1 1/2 limes (see note below), the chili and roughly 2 tablespoons of the coriander stems in a blender. Add some salt and pepper and season to taste. Depending on the limes, you might need to add a little bit of sugar, but be careful, you want this to be quite acidic. It should also be quite spicy :-)

3. Just before serving (and really JUST before), add the dressing to the salad and mix thoroughly. Season to taste and add the coriander. 

A quick note on the dressing: it is a bit difficult to give exact amounts here. Much will depend on the sweetness of the mango and the sourness of the limes. Essentially, what you are aiming for is a balance between the sweetness of the fruit and the acidity of the dressing. The salad should have a nice zing to it.

Saturday, June 15, 2013

Green beans with lemon vinaigrette and parmesan

For some reason I tend to make beans mainly in winter. In the summer I veer towards grilled veggies or salads (and I am no fan of adding green beans to salads)....until, a few years ago, my mother told me about this recipe. I think it's the perfect way to make green beans in the summer. It's worth making this just for the color combination alone :-)


Ingredients (serves 2):

1 packet of green beans
1 lemon
1 handfull of grated parmesan 
olive oil 
salt, pepper

Preparation

1. Clean the beans and cook them for 5-7 minutes in boiling (salted) water. The beans should be "al dente", not soft or limp! Once cooked, drain the beans and chuck them in a bowl filled with ice cold water (best to add a few ice cubes). This not only prevents the beans from cooking further, it also turns the beans a lovely bright shade of green. 

2. For the vinaigrette just mix 4 tablespoons of olive oil with 2-3 tablespoons of lemon juice, some salt and some pepper. You want this to be on the sour side (the parmesan will partially compensate the acidity later on). 

3. Just before serving, mix the beans with the vinaigrette and sprinkle with the parmesan. 

Sunday, June 9, 2013

Spicy oven-baked sweet potatoes

Sweet potatoes are a favorite in my household and I make them at every opportunity. In the winter I usually prefer the mashed version, but during barbecue season these here are great as a side-dish. They are extremely easy to make and are perfect to accompany all kinds of meat dishes. Although, truth be told, I am perfectly happy having just these, some grilled vegetables and a nice fresh yoghurt dip.


Ingredients (for 2):

1-2 sweet potatoes (I used 2 medium-sized ones)
1 red chili
coarse sea salt, black pepper
olive oil
chili powder (optional)
maple syrup (optional)

Preparation

1. Peel the sweet potatoes and cut them into longish stripes. Finely slice the red chili. Mix both with 2 tablespoons of olive oil, a generous amount of sea salt, and some back pepper. In case you prefer your potatoes on the spicy side, add half a teaspoon of chili powder. 

2. Cover a baking tray with some baking paper and evenly spread the potatoes on top. Place in the preheated oven (180°C, fan-assisted) for about 20mins. 

3. Now you have two options: you can either just leave the potatoes in for another 10 minutes at the same heat. Alternatively, you can drizzle the potatoes with some maple syrup (1 tablespoon is plenty, otherwise it will be way too sweet) and place the tray under the grill for about 5 mins. Watch this carefully, it will burn quickly. 

Just to make sure that there are no misunderstandings...these aren't going to be crispy! They contain less starch than normal white potatoes, so unless you fry them (recipe to follow), they are going to remain soft where they are thickest, turning crisp only on the thinner ends.

Monday, June 3, 2013

Ainsley Harriott's Kofta Kebabs with Yoghurt and Greek Salad

The original recipe for the lamb comes from Ainsley Harriott's "Low Fat Meals in Minutes" and has been a firm favorite with my family for years. The combination of minced lamb, mint, coriander, chili and cumin works like a charm, especially when served in warm pita bread with a fragrant yogurt dip and fresh Greek salad. This is a must-do even for those of you who are  not usually so keen on lamb. Trust me!  


Ingredients (serves 4):

700 g minced lamb (shoulder or leg)

1 bunch of fresh coriander
1 large clove of garlic
1 handful of fresh mint leaves
1 large red onion
1 teaspoon ground cumin
1 red chili
250 g yogurt
1 tablespoon lime juice
1/2 tablespoon of sugar
1 packet feta cheese
1 large red pepper
1 small packet of cherry tomatoes
1/2 cucumber
1/2 tablespoon of dried oregano
olive oil
salt, pepper

Preparation: 

1. You will need three bowls for this: one medium-sized mixing bowl for the meat, one salad bowl, and a smaller one for the yogurt dip. Have these ready on your work surface before you begin.

2. Chop the onion finely, placing 2/3 in the bowl for the meat and the rest in the salad bowl. Finely chop the coriander, the mint, and the garlic: half of each goes into the meat bowl, half into the dish for the dip.

3. Place the minced lamb in the meat bowl, add the cumin, a generous amount of salt and pepper, the finely cut chili (or half, depending on how spicy you want this to be) and mix well. Form longish shapes, place on a tray and rub with a bit of olive oil. Set aside. 


4. Cut the feta cheese in cubes (or just crumble it using your hands) and add to the salad bowl. Wash the peppers, peel the deseed the cucumber and cut both into 1cm pieces before adding to the bowl. Halve the cherry tomatoes and add them to the mix. Dress with a generous 4 tablespoons of olive oil, the dried oregano, some salt (not too much, the feta can be quite salty) and some black pepper. Mix well and set aside.

5. For the dip, simply mix the yogurt with the herbs, add the lime juice, a pinch of sugar, salt and pepper. Season to taste.

6. The lamb is cooked for 20 mins on the pre-heated barbecue (medium-heat). Toast the pita bread on the bbq or simply use a toaster (leave them in until they begin to puff up, that's when they are ready).

We eat these as you would eat a kebab: the warm pita bread is filled with chunks of the lamb, salad and a generous serving of the yogurt sauce. 

Wednesday, May 22, 2013

Stir-fried beef and green asparagus

Stir-fries are a must for those of us who are often faced with the dilemma of having to (wanting to!) cook proper meals with little time on our hands. Stir-fries are easy, quick, yummy and healthy! Who wants to eat a ready-made meal if you can have tender beef, crunchy asparagus all mixed with a sauce of teriyake, lime juice, fresh ginger and hot chilis? Give it a try, I promise it's not difficult!
And for those with little or no stir-frying experience: this is all about fast cooking at high temperatures. Think "The Fast and The Furious" rather than "Sense and Sensibility". First and foremost this means that need to have everything ready. You don't want to start chopping ingredients in the middle of this. Also, remember that this is going to be very quick, so if you need to set your table, cook some rice, open a bottle of wine, you should all of this in advance (or, even better, delegate).


Ingredients (serves 2):

2 spring onions
2 tablespoons of finely fresh chopped ginger
2 cloves of garlic
1 red chili
5 tablespoons of teriyaki sauce
2 tablespoons of soya sauce
1 tablespoon of dark sesame oil
1 tablespoon of lime juice
1 teaspoon of cornstarch
2 teaspoons of sugar
350gr rumpsteak
500gr green asparagus
salt, pepper, extra sesame oil

Preparation

1. Clean and finely slice the spring onion. Peel the garlic and chop finely. Cut the chili in rings (I tend to leave the seeds in to add that extra spice). Remove the fat from the steak and slice diagonally into 1/2 cm stripes. Remove the woody ends from the asparagus and cut into 2-3cm pieces. 

2. Mix the ginger, garlic, chili, teriyaki sauce, soya sauce, sesame oil, sugar, lime juice and blend in the cornstarch. Set aside.

3. Heat a wok to high heat, add a bit of sesame oil and fry the asparagus. After about 2 minutes start adding spoonfuls of water one at a time (4-5 in total), each time allowing the liquid to boil away before adding more. The asparagus should still be quite crunchy. Remove the wok from the heat.  

4. Heat a large frying pan to a very high heat, adding a tablespoon of sesame oil. Once the pan is searingly hot (don't worry if it starts to smoke a little) fry the meat very briefly, just until it starts to brown slightly. The idea is not to cook the meat through (it will only end up getting tough), so just leave it in the pan for about 15 seconds on each side (I recommend you do this in batches). Remove the cooked meat and place it in the wok.

5. Once the meat is all done, return the wok to the stove and heat everything up (don't be shy on the heat, you want this to be sizzling). Add the sauce. mix well and wait until it starts to bubble away. The cornstarch will make the sauce thicken slightly and it will stick to the meat and the asparagus. This should start happening after a few minutes. Sprinkle with some spring onions and serve immediately.


Recipe adapted from: www.esssen-und-trinken.de

Saturday, May 18, 2013

Delicious Rhubarb!

Rhubarb makes for great dessert: it tastes lovely but isn't too sweet. It's fantastic in crumble, but for those with little time on their hands, I recommend this, much quicker and simpler, recipe. The combination of the compote and cream is perfect, and the addition of the meringue adds a lovely crunch. 


Ingredients (serves 4)

500gr rhubarb
30gr sugar (the original recipe used 50gr but that's way too much)
40gr meringue
250ml whipping cream
1 teaspoon vanilla sugar
2 tablespoons of white wine


Preparation

1. Peel the rhubarb and cut into 2cm pieces. In a saucepan mix the fruit, white wine and sugar. Bring to a boil, reduce the heat and allow to simmer for a few minutes until the rhubarb is soft (rhubarb has a high water content, so this goes very quickly). Allow to cool off completely,


2. Roughly chop the meringue. Whip the cream, adding the vanilla sugar as you go. 


3. Fill 4 glasses with the rhubarb, cream, and meringue. Serve immediately. 

Tuesday, May 14, 2013

Fillet of pork stuffed with spinach, feta cheese and dried tomatoes

I have a somewhat ambivalent view on pork, probably a result of the many meat scandals during my youth. Back then it became fashionable to pay a farmer to raise your very own (presumably organically fed) pig, which my parents duly did. I think my mother never realized that she was expected to partake in the slaughter of said pig! As it happens, she "overslept" on that particular day and only arrived once the deed was already done :-)

But while I normally prefer chicken, beef, veal or lamb, I do occasionally feel a craving for a nice fillet of pork. The meat is very tender (prepared properly at least) and not as fatty as some other cuts of pork. In this case I elected to stuff my fillet with feta cheese, spinach, and dried tomatoes. As side dishes I served roast sweet potatoes with feta cheese and some spinach.


Ingredients (serves 2-3): 


1 fillet of pork (400-500gr)
1/2 packet of feta cheese
1 handful of sundried tomatoes

500gr fresh spinach
2 shallots
1 clove of garlic
salt, pepper, nutmeg, olive oil

Preparation: 

1. First of all, you need to prepare the meat - your aim being to create a large surface which you can then fill and roll up. This is best done by first placing a long cut along the middle of the fillet (taking care not to cut all the way through) and folding the two sides outwards as far as possible. In order to flatten the two sides of the fillet, repeatedly cut into the meat (lengthwise) always making sure not to cut too deeply. Finally, pound the meat using a rolling pin in order to create as large a surface as possible. If you are unsure how to do this, ask your butcher to do it for you.


2. Wash the spinach. Finely chop the shallots and the garlic and heat some oil in a pan. Gently fry roughly 1/3 of the garlic and shallots until they just start to brown, then add 1-2 handful of the spinach. Once the spinach is cooked (this takes only a few minutes), season with salt and pepper and set aside to cool off. Don't rinse the pan, you are going to need it again later on.


3. Season the pork from both sides and spread it out on your work surface. Fill with the cooked spinach, the feta cheese and some roughly chopped sundried tomatoes. If you want to, you can also add some roasted pine nuts. Once the filling is in, carefully roll up the meat and tie it up using some kitchen string (in case you haven't done this before, take look at this video: Tying a roast). 


4. Once the pork has been filled and tied up, place it on the pre-heated  barbeque (medium heat) for 25-30 mins. During this time, fry the remaining shallots and garlic in your pan and add the rest of the spinach. Season generously with salt, pepper and some nutmeg. 

5. Once the meat is done, remove from the barbeque, cut off the string and slice before serving.

Friday, May 3, 2013

BBQ Chicken with grilled vegetables

Spring may be slow in coming, but the BBQ seasoned has been officially opened chez Marten. And as usual at the beginning of the season, most things I fancy eating end up being chargrilled. This chicken is a firm favorite with my family and has the added charm of being easy to make AND being easy to shop for. The chicken is wonderfully tender and the marinade can be adjusted to suit your individual taste.    


Ingredients (serves 4)

800 gr chicken breast (without skin) 
Note that this dish can also be made using chicken wings, the only thing that changes is the cooking time - chicken wings will take about 20mins on the bbq.


For the marinade: 
1 1/2 tablespoons of tomato concentrate
4 tablespoons olive oil
1 tablespoons honey
1 teaspoon rosemary
1 tablespoon sweet paprika powder
1/2 tablespoon hot paprika powder
1 tablespoons ketchup
1 teaspoon coarse sea salt
2 cloves of garlic
black pepper
(1 tablespoon of grated ginger or some chopped red chili are optional)

2 red peppers
2 zucchini
1 pack of long-stem broccoli
1 teaspoon rosemary
salt, pepper, olive oil


Preparation: 

1. Place all ingredients for the marinade in a blender and mix until you obtain a smooth paste. Cut the chicken into 2cm stripes (lengthwise). In a freezer bag mix the marinade and the chicken and place in the fridge for about 2-3 hours. Remove from the fridge a good half hour before you start cooking.


2. Wash the vegetables and cut the peppers and zucchini into wide stripes (see picture below). Mix vegetables with some olive oil, salt, pepper and rosemary.

3. Heat the barbecue. Once heated, place the vegetables on the grill (it's best to use a grilling tray). Allow the vegetables to roast for about 10-12 mins before adding the chicken. Since the pieces are quite small, the meat should need no more than 4 minutes on each side.


I serve this with some yoghurt dip (herbs and garlic) and some bread or oven-baked potatoes.


Wednesday, May 1, 2013

Lamb Köfte with Coriander, Chili and Feta

My daughter's class recently undertook a so-called "food exploration", in which the kids were encouraged to try new things - not always an easy task, I am sure. My daughter initially chose somewhat boring dishes to bring: sausage rolls and meatballs. So in order to make things a bit more "interesting", I decided to make at least the later a bit more interesting. I ended up with a dish that I will surely cook again in the future: lamb meatballs with a feta-cheese center, flavored with fresh coriander, ground cumin and chili.


Ingredients (for approximately 12 meatballs):

600gr  minced meat (I recommend you use lamb)
1/2 bunch of fresh coriander
1/2 red chili
1 medium sized onion
1 teaspoon of ground cumin
1 egg
2 tablespoons of bread crumbs
1/2 packet of feta cheese (cut in 12 cubes)
salt and pepper


Preparation:

1. Finely chop the onion, chili and coriander and place in a large bowl. Add the minced meat, the egg, bread crumbs, cumin, a generous amount of salt and some black pepper. Mix using your hands and (if you dare) taste to check the seasoning. If you don't, you might want to take a small amount of the mixture and quickly fry it in a pan to ensure that you have enough salt. Or you can just trust our instincts and hope for the best :-)

2.Divide the mixture into 12 portions and form meatballs, placing a piece of feta cheese at the center of each.

3. Fry the meatballs over medium heat (alternatively you can put them on the BBQ) for about 10-15 mins until cooked through.

Serve with some greek salad, yoghurt dip with herbs and some pita bread.

Tuesday, April 23, 2013

Chicken wraps with home-made hummus and grilled peppers

Wraps make for an easy and fun dinner. They are versatile and you can fill them whichever way you like. In this case I went for a combination of barbecued chicken, grilled peppers, home-made hummus and some avocado. Very tasty!


 Ingredients (8 wraps):

400gr chicken breast (without skin)
1 ripe avocado
1 pack of cherry tomatoes
1 bunch of rocket salad
2-3 large red peppers
1 pack of tortilla wraps
2 teaspoons of paprika powder

For the hummus: 

1 can of chickpeas
1 teaspoon of cumin
1 teaspoon of cayenne
Juice of one lemon
2 cloves of garlic
2-3 tablespoons of olive oil
2 tablespoons of Tahini (sesame paste)


Preparation

1.  Cut the chicken breasts in half lengthwise so that you end up with two thin chicken-schnitzel for each breast. Rub the meat with some olive oil, salt, pepper and the paprika powder. Wash the peppers and slice into longish pieces about 2-3 cm wide. Mix the peppers with a bit of olive oil and season with salt and pepper. 

2. Place the chicken and peppers on the pre-heated barbecue (medium heat). I recommend using a shallow aluminum dish for the peppers. The chicken will be done after 2-3 minutes on each side because the pieces are relatively thin, the peppers will probably take a bit longer.  I recommend waiting until the skin starts to look slightly seared.  

3. In the meantime, drain the chickpeas but retain the liquid. In a mixer, blend the chickpeas, garlic, cumin, cayenne, salt, pepper and the tahini with 2-3 tablespoons of lemon juice and the olive oil. Puree until you have a smooth consistency (add some of the retained liquid if the mixture is too firm). Season to taste with lemon juice.


4. Peel the avocado, remove the pit and cut the avocado in smallish cubes. Wash the rocket salad and the cherry tomatoes. Cut the later into halves. 


5. Now it's time to assemble your wraps. For this, spread a generous tablespoon of hummus over the middle upper half of each tortilla wrap. Then add peppers, sliced chicken, avocado, tomatoes and some rocket, making sure not to "overload" your wrap. In order to fold the wrap for serving, first fold up the lower part of the tortilla, then fold the sides inwards. I usually wrap them in some wax paper and pile them on a plate for serving.

Saturday, April 20, 2013

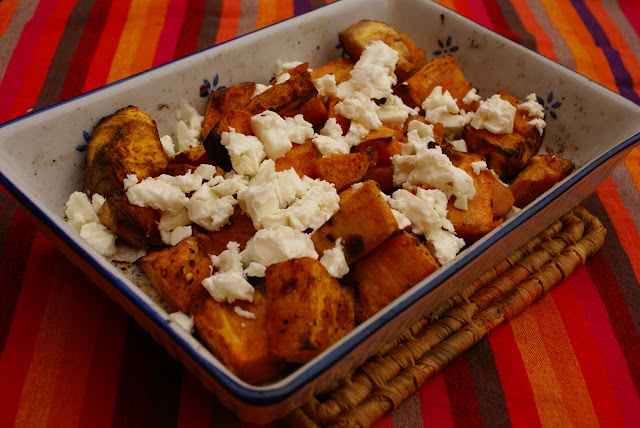
Roast sweet potatoes with feta cheese

I love sweet potatoes...in any form. They have a lovely texture and their sweetness goes incredibly well with meat dishes. In the winter I tend to serve them mashed, but in the summer I prefer this variety. The salty flavor of the feta cheese is in perfect balance with the rich sweetness of the potatoes. Add a bit of chili and you have a perfect side-dish for your barbecued meat.


Ingredients (serves 2): 

1 sweet potato (two if they are small)
100gr of Feta cheese
1/2 tablespoon of hot chili powder (optional)

Preparation

1. Peel the sweet potato and cut into 2cm cubes. Coat with a bit of olive oil and season with salt, pepper, and the chili powder. Put the potatoes in a small baking tray and place it in the oven at 200°C (fan assisted). Roast for about 30 minutes until the potatoes start to turn brown around the edges. 

2. Remove from the oven and crumble the feta cheese over the potatoes. 


Recipe adapted from Jamie Oliver "30-Minute Meals"

Tuesday, April 16, 2013

Lamb koftas in tikka marinade with tomato raita

During the past few summers minced lamb has been one of our favorite things to put on the barbecue. When I saw this recipe in Reuben Riffels amazing book, I just had to try it. While it uses pieces of leg of lamb rather than the minced variety (recipe to follow), the combination of flavors is amazing and now that the weather has finally turned and the BBQ season is officially open....


Ingredients (serves 4):

600gr leg of lamb (de-boned)

For the tikka marinade:
1/2 cup of plain yoghur
1/2 cup of tomato passata
1/4 cup of olive oil
3 crushed cloves of garlic
1 tablespoon of grated fresh ginger
2 teaspoons of cayenne
2 teaspoons of paprika
1 teaspoon of chili powder
1 teaspoon of garam masala
1 teaspoon of salt

For the tomato raita:
1 cup of plain yoghurt (again, use the thick variety)
1 handful of cherry tomatoes, diced
1/2 bunch of chopped fresh coriander 
1 tablespoon of olive oil
1/2 teaspoon of ground cumin

In addition you should get some naan (you can make this yourself, but it's easier to buy it) and some mango chutney. In case you can't find naan and can't be bothered to make it yourself, just use some toasted pitta bread.

Preparation:

1. Mix all the ingredients for the tikka marinade in a bowl and mix well. Cut the lamb into longish strips and mix with the marinade. Cover and leave in the fridge for 4 hours.


2. Take the meat out of the marinade, pad dry and thread 2 pieces of meat on one skewer each (I recommend allowing some time for the meat to reach approximately room temperature before proceeding). Place on the barbecue (medium heat) and cook for about 6 minutes on each side, occasionally brushing with the remaining marinade. Set aside.


3. For the raita, mix all ingredients in a bowl and season to taste with salt and pepper.

Recipe adapted from: Reuben Riffel, "Reuben cooks: food is time travel"

Sunday, April 14, 2013

Spaghetti Arrabiata

I can't really imagine that there are still people out there who have never cooked spaghetti arrabiata and I initially didn't plan to post this (after all VERY simple) recipe, but when I made this the other night I was reminded (once again) what a beautiful dish this is, so here we go. Spaghetti arrabiata is extremely simple to make, requires a very short list of ingredients and is a perfect blend of tastes. The sweetness of the tomatoes is nicely balanced by the chili, add a bit of parmesan and you have a perfect dinner.


Ingredients (serves 4): 

2 cans of peeled tomatoes
3 cloves of garlic
2 shallots
1 tablespoon of tomato concentrate
1 teaspoon of sugar
1 red chili
1 handful of fresh cherry tomatoes

Preparation:

1. Peel the shallots and the garlic, chop finely. Cut the chili in rings (depending on how hot the chili is you might want to remove the seeds).


2. Fry the shallots in some olive oil until translucent. Add the garlic and the chili and continue to fry for a few more minutes. Then add the tomato concentrate, canned tomatoes, an additional can-filling of water, the sugar and some salt and pepper.


3. Stir well and set to simmer for about 1 hour. I leave the lid on, but tilt it slightly so that some of the steam can escape. After about half an hour add the cherry tomatoes (cut in half).

4. When the hour is up the sauce should have a fairly thick consistency. Season to taste with salt, pepper and sugar (as needed). The sauce should have a slightly sweet and at the same time spicy flavor.

Sunday, April 7, 2013

Poussins with roast vegetables


Poussins are not an everyday dish, but they are a real treat. I love the fact that each person at the table will have their very own mini-chicken and their meat is wonderfully tender. I canvassed the web for interesting recipes, but found that there was really nothing much out there (I was also surprised to find that the recommended cooking times varied massively). In the end I decided that simplicity is best and went for an oven-baked version with grilled vegetables and some yoghurt dip on the side.


Ingrediens (serves 3)

3 poussins (they usually weigh around 400gr each)
one red and one yellow pepper 
1 zucchini
2-4 shallots 
5 parsnips
3 medium sized carrots
5-6 cloves of garlic (unpeeled)
3 mid-sized potatoes
2 teaspoons of rosemary 
salt and pepper
olive oil 

Preparation: 

1. Wash the peppers and the zucchini. Slice the zucchini (not too finely) and cut the peppers into rough chunks (you are not going for a fancy-haute-cuisine look here). Peel the carrots and potatoes. Cut the carrots into longish pieces and the potatoes into 1cm cubes. Quarter the parsnips lengthwise. Wash and dry off the poussins


2. Boil the carrots, potatoes and garlic cloves (still unpeeled!) in a bit of salt water for about 5 mins, drain and allow to cool off briefly (it's best to do this in order to ensure that they are going to be done at the same time as the poussins and the softer vegetables). Now throw together all of the vegetables in a large bowl and dress with 2 tablespoons of olive oil, plenty of course sea salt, black pepper and the rosemary. Spread the vegetables evenly on a baking tray. 

3. The poussins only need to be rubbed with a bit of olive oil and seasoned with salt and pepper. 


4. Heat the oven to 180°C (fan-assisted, otherwise aim for 200°C). Put in the tray with the vegetables and place the poussins on a rack just above. The poussins need 45 mins.

I served this with some yoghurt mixed with a handful of finely chopped herbs and some salt and pepper.

Saturday, April 6, 2013

Green asparagus soup with curry


In Germany we tend to eat mainly the white asparagus, but since it's been so unseasonably cold the harvest is likely to be delayed somewhat. In the meantime we have to make do with green asparagus, which is fine with me. While I usually prepare it cooked al dente and dressed with some olive oil and lemon juice, it's great for soups too. Here I have added a bit of curry power, which gives the whole thing a slightly exotic touch.


Ingredients (serves 2):

1 bunch of green asparagus
500ml vegetable stock
2-3 tablespoons of cream
1 teaspoon of curry powder
1 teaspoon of cayenne pepper

Preparation

1. Peel the lower part of the asparagus and remove any hard ends. Cut each asparagus in 2-3cm pieces and cook them in the broth until soft (around 10mins). 

2. Puree everything until you have a smooth liquid and add the cream. Season generously with salt and some black pepper and add the curry powder and the cayenne. The soup should have a slightly spicy note.  

Thursday, April 4, 2013

Malfatti with Sage-Butter

Spring is proving to be a bit reluctant this year, but the few sunny days that we've had have definitely given me a yearning for a culinary change. No more chestnut soups or thick winter stews for me! Instead, we are going to start focussing on the new seasonal products, the first one being: SPINACH! I love spinach in all varieties and you can be sure to see a few more recipes using spinach in the coming week.

This time, I have decided to present an Italian recipe: Malfatti. They are similar to Gnocchi but instead of using potatoes as a base, these are a lovely mixture of ricotta, parmesan and (of course) spinach. 

Ingredients (serves 4-6):


500gr fresh spinach

1 small onion, finely chopped
100gr of butter
90gr of parmesan, grated
250gr ricotta
3 eggs
2 egg yolks
230gr of flour
Nutmeg
12 sage leaves


Preparation:
 
1. In a large pan, fry the onion in a bit of butter or olive oil until transluscent. Add the spinach and sautee until soft (this takes just a few minutes). Season generously with salt and black pepper. Set aside in a colander to drain. Once most of the liquid is gone (you might want to squeeze the spinach a bit to get rid of any excess moisture) and the spinach has cooled off, chop finely using a large knife.


2. In a bowl, mix the ricotta, 70gr of finely grated parmesan and the eggs (including the egg yolks). Add the spinach, then the flour before seasoning one final time with salt, pepper and a bit of nutmeg.

3. Bring plenty of salted water to a simmer in a large saucepan. Cover your worksurface with a generous quantity of flour. Using roughly one tablespoon of dough at a time, form longish shapes (see picture above), roll them lightly in the flour and set aside. Once they are all done, place them in the water. The Malfatti will sink to the bottom of the saucepan first, but resurface when they are done (this takes around 5 minutes). 

4. In a large pan, heat the butter until it starts to brown slighly. Add the sage leaves and allow them to infuse the butter. Once the Malfatti are cooked, remove them from the water using a slotted spoon and add them to the sage-butter for a few minutes. 

Serve with grated parmesan.

Tuesday, April 2, 2013

Crispy Harissa-Fish

Spring may be reluctant to make an appearance but this doesn't change the fact that the summer is fast approaching - time to start thinking about the benefits of the "light cuisine".  And if you want to eat more health consciously then it's easiest to stick to meals that were always meant to have a low fat content. Asian cooking comes to mind of course, but the principle is a more general one: instead of achieving taste using butter and cream, try to achieve taste using strong spices instead.

On the menu today: Donna Hay's crispy Harissa-Fish. It's easy to make, takes almost no time to cook and it's pretty healthy on top. Donna Hay serves the fish with lemon couscous, but since I am no big fan of couscous in any form, I have replaced it instead with my chili-ginger carrots and some green asparagus.


Ingredients (serves 2): 

400gr filets of white fish (skin on)
2 tablespoons Harissa paste
1 tablespoon olive oil

1 bunch of green asparagus 
1/2 tablespoon of lemon juice
1-2 tablespoons of olive oil

Preparation

1. Wash the fish and dry off. Season with a bit of salt and black pepper and smear the flesh side of the fish with the harissa paste. 


2. Heat 1 tablespoon of olive oil in a pan and fry the fish: 4-5 minutes on the skin-side, 1 minute on the other side. 

3. For the asparagus, cut off the hard ends and chop each asparagus in 3 pieces. Boil in some salt water for a few minutes until they are al dente. Drain and dress with the olive oil, lemon juice and sprinkle with some course sea salt and pepper. 

Recipe adapted from Donna Hay "Fresh, Fast, Simple"

Monday, March 25, 2013

Super easy, super delicious cake

A contribution I wrote before breaking my finger while SWIMMING!

When I cook, I rarely stick to a recipe 100%....and while I have had the odd mishap, this method usually works out for me. It's a method, however, which becomes a problem when baking. Baking requires total and complete adherence to the recipe, only the very experienced can hope to deviate without disastrous consequences. So in my quest to master at least a basic level of baking skills, my biggest challenge has been my knack for merely "skimming through" recipes, rather than reading them in detail. But I am getting better at it.

My latest creation is a sour-cream cake, which is ridiculously easy to make and incredibly delicious. It's not something you want to eat while on a quest for the perfect bikini body, but when it comes to comfort food it doesn't really get any better than this. 


Ingredients: 

4 eggs
1 cup* of vegetable oil 
2 cups of sugar
1 cup of sparkling water
3 cups of flour
1 packet of baking powder
600ml heavy whipping cream**
600gr sour cream
2 packets of vanilla sugar
2 tablespoons of lemon juice
6 tablespoons of sugar + 3 tablespoons of cinnamon

* The measurements are given in "cups" here...by which I don't mean the American "cup", but an actual tea of coffee mug.

** In order to ensure that the sour-cream/cream mass is stable, use a whipping cream with as high a fat content as possible. Alternatively, you can use a special powder to stabilize whipping cream (Sahnesteif in Germany).

Preparation:

1. First you need to make the dough. For this, simply mix the eggs, the oil and 2 cups of sugar in a large bowl. Add the sparkling water and then the flour and baking powder. The dough might seem quite liquid, but this is how you want it to be. 

2. Line a deep baking tray with baking paper and pour in the batter, spreading evenly. Bake at 175°C for 25-30 mins. Remove from the oven and allow to cool off completely.

3. In the meantime, whip the cream together with the vanilla sugar aiming for as firm a consistency as you can get. Carefully fold in the sour cream and the lemon juice and evenly cover the cake with this mixture. Place in the fridge overnight (don't cover the cake!). 

4. Shortly before you want to serve your cake, sprinkle generously with the sugar-cinnamon mixture.

Tuesday, March 12, 2013

The perfekt filet steak

This is definitely one for the carnivores!

A good filet steak is actually not difficult to make, but you need to make sure that you use only top quality ingredients. No point in trying to safe a few quid here, all you are going to end up with is a dry piece of meat. So go ahead and splurge a bit, it'll be worth it.   


As always when it comes to meat, make sure that you remove it from the fridge a good 2 hours before you start cooking. This gives the meat time to warm up a bit and will prevent the meat from ending up charred on the outside while raw on the inside. 

For this recipe I use filetsteaks of 200-250gr a piece, but you can of course use bigger or smaller pieces as desired. Just tie each steak with a bit of string to make sure that it keeps its shape, rub it with a bit of olive oil and season with salt and pepper.  


Heat up your oven to a temperature of 160°C. Place a pan on your stove and heat it up to a high temperature (don't worry if the pan starts smoking slightly, this is what you want). When the pan is hot, sear the meat for about 1 minute on each side. It will be noisy and there will most likely be quite a bit of smoke, but that is entirely normal, so no need to panic. When the time is up, place the meat in the oven (it's best to use a shallow oven-dish for this) and insert a meat thermometer. It will take roughly 20-30 minutes for the meat to reach the desired core temperature of 55°C (medium), depending on the size of the steaks. Remove the meat from the oven, wrap it (loosely) in some aluminum foil and allow to rest for a good 10mins. It will be tempting to take short-cuts here...don't!

Wednesday, March 6, 2013

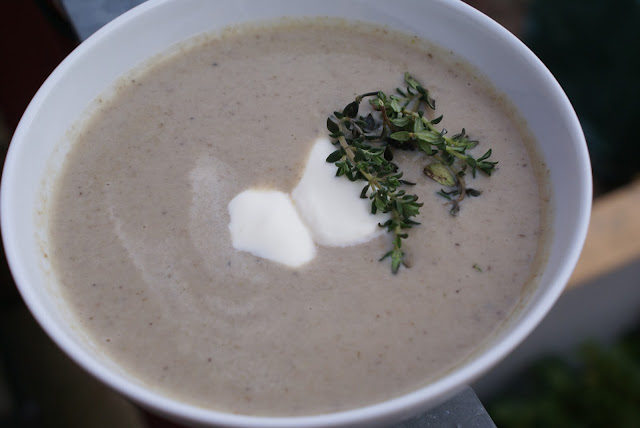
Creamy Mushroom Soup


Mushroom soup is a typical dish to eat in the autumn, but I figure it's still cold enough outside these days to have another go. Everyone in my family likes mushrooms and this soup has the added benefit of being quick and easy to make.

You can use whichever mushrooms you like, in this case I used some brown button mushrooms, king oyster mushrooms and some shitake mushrooms. 


Ingredients (serves 4-6):

600gr fresh wild mushrooms
30gr dried porcini
1 tablespoon of butter
1 red onion, chopped finely
5-6 twigs of fresh thyme, leaves picked
2 cloves of garlic
1l vegetable stock
150 ml single cream 

Preparation: 

1. Carefully clean the mushrooms (never use water for this! In case they are dirty, just use a soft cloth to wipe them) and cut into rough chunks. Place the dried porcini in a small bowl and cover with warm water. Let them sit for about 30-40 mins until soft. 


2. Gently fry the onion in a bit of butter, then add the mushrooms, garlic (I simply throw in the whole cloves) and the thyme. Turn the heat up slightly. After a few minutes you will see that the mushrooms begin to lose quite a bit of water, at this point add the drained porcini (keep the liquid!) and some salt and black pepper. Continue to fry until the mushrooms just start to brown. 

3. Now transfer everything to a large pot and add the porcini-liquid (poured through a sieve) and the stock. Cook at a light boil for about 30 minutes before mixing everything in a blender, adding the cream as you go. 

4. Finally season to taste with salt and pepper. In case the soup is still too thick, simply add a bit more water or stock. 

Note: in case you are making this for guests, I recommend you take a couple of handful of the chopped mushrooms and fry them in a separate pan. You can then use them to decorate your soup when serving.

Tuesday, March 5, 2013

Indian Naan Bread

For those living in the UK it shouldn't be all that difficult to obtain decent naan bread. In Germany, however, it's close to impossible. More often than not the bread is dry and hard. Instead, I suggest you try making your own. As it turns out, this is not as difficult as you might think. The only challenge is the dough, which is extremely sticky and takes some getting used to. But once you've made your first batch, you'll never go back to the store-bought variety!


Ingredients (makes 4-6 naans):

220
gr flour
12gr fresh yeast (alternatively 1 teaspoon of dried yeast)
3 tablespoons of yoghurt
1 tablespoon of melted butter
1 teaspoon of sugar
2 tablespoons of olive oil
1/2 teaspoon of baking powder
80ml warm water

Preparation:

1.  Dissolve the yeast in the water, adding a tablespoon of sugar (best done in a tall glass). Wait for about 10 minutes until the mixture starts frothing, then add the yoghurt and the olive oil, mixing well.

2. In a large bowl, mix the flour, baking powder and some salt. Add the liquid ingredients and stir using a fork. Once the ingredients start coming together, use your hands to form a soft dough. This is the only really tricky part of this recipe: the dough is going to be extremely moist and sticky and it will seem as though you don't have enough flour, but trust me, it will work. Just keep a small bowl of flour on the side to dip your fingers into now and then. 

3. Once the ingredients are combined into a dough, immediately stop kneading. Cover the bowl with a warm, damp kitchen towel and place in a draft-free place to rest for a good 1 1/2 hours. By then the dough should have doubled in size, at least!

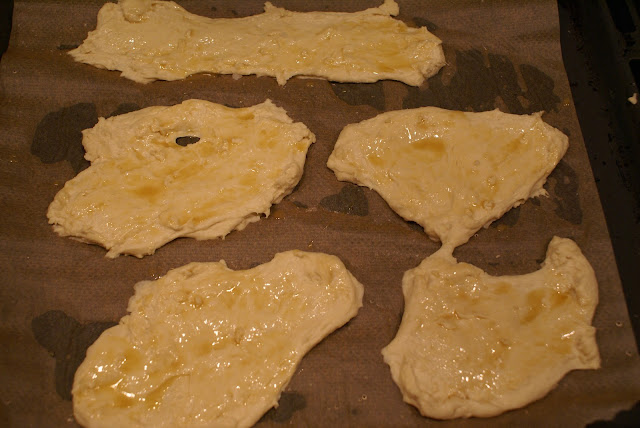
3. Once the dough has risen, simply "deflate" it and separate into 5 pieces (depending on how large you want your naan to be). On a baking tray (covered with baking paper) form longish shapes as seen in the picture below. Sprinkle with some coarse sea salt and brush with the melted butter before placing in the oven (250°C). The naan will be done in about 5 mins.


Rezept adaptiert von: Aarti Sequeira

Tuesday, February 26, 2013

Lovely beef stew for the last cold winter days


It's been freezing outside and it's pretty clear that winter is here to stay for a bit longer. I can't wait for spring to arrive, but I figure I might as well make the most of the prolonged cold and cook some last wintery dishes. Stews of any kind are clearly part of this, so here is my favorite beef stew. It's a slightly simplified version of the French "Boeuf Bourguignon"and is served with dumplings and, if so desired, a small side salad.


Ingredients (serves 6):

1,4kg stewing beef (cut into 1 1/2 cm cubes)
250gr small shallots or onions
300gr carrots
300gr small brown mushrooms
150gr bacon, cut into small cubes
2 tablespoons of tomato concentrate
2 tablespoons flour
1l beef stock
500ml red wine 
2 bay leaves
2 cloves of garlic
fresh thyme (4-6 sprigs)
1 teaspoon of sugar
1 tablespoon of paprika powder

Preparation:

1. Peel the shallots and the carrots. Cut the shallots into halves and the carrots into medium size cubes.  Brush any dirt off the mushrooms and cut them into half.  


2.  In a large casserole, fry the beef and the bacon in 3-4 batches, allowing the meat to brown just slightly. Dust each batch with a bit of flour (2 tablespoons in total) before removing from the saucepan. When the meat is done, remove and set aside. Now put the carrots, shallots, and mushrooms in the casserole and fry for a few minutes until the onions start to soften slightly. 

3. Add the beef and stir in the tomato concentrate, sugar, paprika and some salt and pepper. Mix well before adding the garlic, bay leave and the thyme. Pour in the wine and the stock. Bring to a simmer and allow to cook on medium heat for 2 1/2 to 3 hours until the meat is nice and tender. I recommend leaving the lid on for the first 1 1/2 hours and removing it for the remainder of the time. 

4. When the meat is done, remove the bay leaves and the thyme, season with salt and pepper and, if necessary, add some pieces of cold butter to bind the sauce (in all likelihood this won't be necessary).  

Wednesday, February 20, 2013

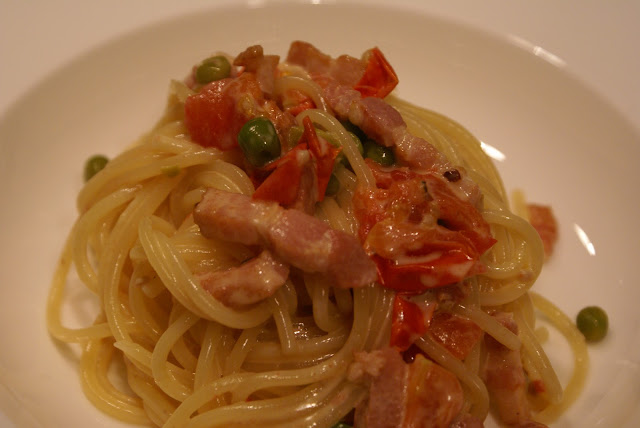
Spaghetti with bacon and peas

It can be a challenge to find the time to cook proper meals during the week and more often than not we are forced to rely on dishes that are above all quick to prepare. Sadly many people go the easy way and resort to fast food or ready meals. Instead, try a quick recipe like this one. It takes no more than 10 mins to prepare, doesn't require many ingredients and your kids will love it. I promise!


Ingredients (für 2):

200gr spaghetti
150ml single cream
150gr bacon, cut into cubes

1 cup of frozen peas
1 handfull of cherry tomatoes
70ml of white wine or Vermouth (alternatively you can use some chicken or vegetable stock)

Preparation:

1. Cook the pasta according to instructions, making sure to reserve a small cup of the water before draining.


2. While the pasta is cooking, fry the bacon in a pan until starts to go crisp. Add the white wine or Vermouth and allow to reduce by about half. Then add the frozen peas and the tomatoes (halved), some salt (careful though, the bacon already contains quite a lot of salt) and pepper. When the peas start to soften, pour in the cream and allow to thicken slightly (this takes just a few minutes at a gentle boil).

3. Mix the pasta and the sauce and season to taste before serving. In case the sauce is too thick, you can add a bit of the water.

Friday, February 15, 2013

Chocolate-Vanilla Cake with Cherries

In German this cake is called "Donauwellen", for which there just isn't a good translation. But despite the admittedly not very inspired title, I strongly recommend you try this. It takes a bit of patience to make, but if someone as notoriously impatient as me can do this, so can you. It consists of two layers of cake, filled with cherries and covered with buttercream and some dark chocolate coating. Yum!


Ingredients

1 large glass of cherries
530gr soft butter (my arteries are clogging up just writing this, but it's sooooo good!)
200gr sugar
2 teaspoons vanilla extract
5 eggs
350gr flour
2 teaspoons baking powder
500ml milk
2 tablespoons of cocoa powder
300gr chocolate coating (dark)
1 pack of vanilla custard powder (for 500ml milk)


Preparation: 

1. Bring 450ml of milk to the boil in a small saucepan. Remove from the heat and stir in the custard powder, mixing well. Cover the top of the custard with some clingfilm and set aside to cool.

2. In a large bowl, mix 250gr of butter with 200gr sugar and the vanilla extract until smooth. Add the eggs, one at a time. Mix the flour and the baking powder in a bowl and add slowly to the butter-egg-sugar mixture. Whisk in the remainder of the milk and spread half of the dough on a baking tray (at least 2cm deep) covered with some baking paper. Mix the rest of the dough with the cocoa power and spread on top of the first layer. Drain the cherries and spread them evenly across the cake before placing the whole thing in the oven (175°C) for 30 mins. Remove and allow to cool.


3. For the buttercream, whisk 250gr of soft butter until smooth, then add the custard one spoonful at a time. Spread over the cake and place in the oven for at least one hour. 


4. Carefully melt the chocolate with 30gr of butter. Wait 10 mins or so until the mixture has cooled off slightly, then spread over the cake. Return to the fridge for another hour until the chocolate has set. 

I usually keep this cake in the fridge but recommend that you take it out half an hour before you want to eat it, to give it some time to warm up.


Recipe adapted from: www.lecker.de